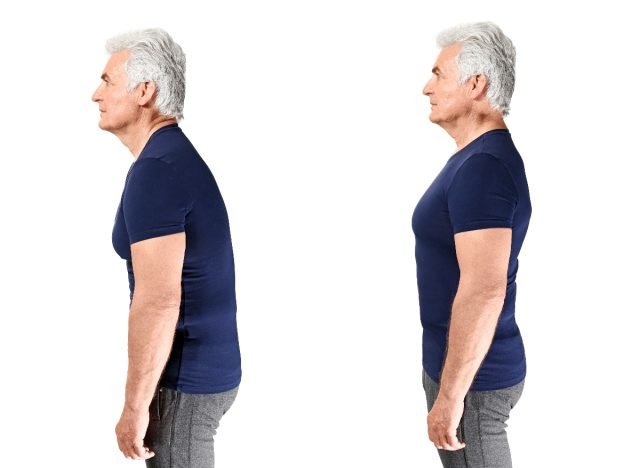
As you get older, you may notice you stand a little more hunched over than you did at 40. Your shoulders might be rounding forward, your head might be moving out in front of your body, or you just don’t stand as tall as you used to. You can try pulling your shoulders back and standing up straight, but after a few minutes, you usually end up right back where you started.
Posture isn’t just about your muscles. It’s also about your nervous system and how your brain recognizes where your body is in space. Here are five exercises that I use with myself and with my clients. We’re going to focus on body awareness, balance, and how well you can control your spine and pelvis.
Some of these exercises are pretty challenging, so I’ll show you different progressions on those. You don’t need to do the most difficult version to get something out of them.
RELATED: 4 Standing Exercises That Restore Calf Strength Faster Than Treadmills After 65
Kneeling Hip Proprioception
This exercise works all the proprioceptors of the hip, which do play a major role in posture. We also use it for our global, or systemic, posture. You’re not going to be fully in balance. You’re going to have to constantly correct it, and that’s actually what we want. The more you have to correct it, the more information your brain is processing about your posture.
How to Do It
- Take a kneeling position. I’m kneeling on my right leg.
- Find a line roughly from the middle of your knee to your femoral head, then to your shoulder and your ear.
- Find that nice gravity line where your ear, shoulder, and hip are all lined up.
- Lift the front leg and maintain that same gravity line. Don’t let yourself lean back.
- Bring up the back foot, so you’re just on your knee, and maintain your ear, shoulder, and hip.
- Move the front leg back and forth while maintaining your ear, shoulder, and hip position.
Recommended Sets and Reps: Do each position for one minute per leg, two to three sets, until you have mastery. Mastery means that you can do it without falling out of your gravity line. Master position one, then position two, then position three, then position four.
Form Tip: If you fall out of your gravity line, that’s totally fine. Just work your way back in.
Seated Swiss Ball Balance
There are going to be small micro movements from the ball, and that’s good. Your goal is to stabilize those without falling out of your gravity line.
How to Do It
- Find an exercise ball and have a seat on it.
- Find alignment from your ear, shoulder, and hip.
- Sit with about 90-degree angles at your knees, with a little external rotation, and sit tall. Simply maintain your balance. This is step one.
- Once you can do that easily for 60 seconds, lift one leg. I’ve got my right leg lifted here, and I’m doing my best to keep my ear, shoulder, and hip in line.
- Hold for about 60 seconds, bring it down, then move on to the other side.
- When you can master that, move into marching.
- Once you can master marching, try to get both feet off the ball and find your gravity line again, with your ear, shoulder, and hip roughly aligned.
Recommended Sets and Reps: Do each position for 60 seconds, one to three sets. Mastery means you can do one to three sets for one minute pretty much perfectly. Make sure you have mastery at each level before moving on to the next.
Form Tip: The ball is going to move. Your posture, for the most part, should not.
RELATED: 4 Wall Exercises That Strengthen Your Core Faster Than Pilates After 65
Four-Point Swiss Ball Balance
We just want to work from the four-point position until you have nice spinal control and balance on the ball. Once you’ve mastered that, you move on to the two-point.
How to Do It
- Get your ball.
- Get both of your hands on it, then one knee, and eventually the other knee.
- Once your balance is established, think about trying to flatten the spine a little bit.
- Gently tuck your chin.
- Stick your butt out just a little bit until you can keep your spine nice and in line.
- Once you’ve mastered that, move on to the two-point. Start by getting your four points of contact and getting yourself set.
- Let the ball roll forward a little bit, then try to get your pelvis under you.
- Re-establish on the ball and find your ear, shoulder, and hip in the same line as best you can.
- Maintain that anywhere from one to three minutes.
Recommended Sets and Reps: Do one to three sets, somewhere between 60 seconds and three minutes. Mastery means you can do one to three sets in that range.
Form Tip: Gently tuck your chin and stick your butt out just a little bit until your spine is in line.
T8-T9 LDOA Posture Hold
If you follow me at all, you’ve seen this a number of times, but it really is one of the best overall posture exercises.
How to Do It
- Start, as always, with your gravity line: your ear, shoulder, and hip in line.
- If you need it to be a little easier, walk your feet forward. That’s going to free up a lot of space and tension for you to manage your spine.
- If you need a little more challenge, walk your feet back. That’s progression one. Just hold here.
- When you can hold easily for one minute, bring your arms forward.
- Spread your fingers, bend your wrists, and spiral open.
- Push your arms forward, and push your shoulder blades forward while you maintain your gravity line.
- Once you’ve done that for one minute, you have mastery. For the last phase, bring up one arm, then the other, and reach up to the ceiling.
- Reach your shoulder blades up to your ears, with your fingers spread, wrists back, and elbows straight, spiraling open.
- Keep your eyes down and stay relaxed in both the jaw and the belly.
- After one minute, relax one arm, relax the other, and relax your spine.
Recommended Sets and Reps: Hold each phase for one minute.
Form Tip: Don’t round your back. Push your shoulder blades forward while you maintain your gravity line.
RELATED: 5 Daily Exercises Women Over 70 Need to Keep Their Knees Strong
Horse Stance Series
Come down on all fours and look for a neutral spine. You’re not flattening or lengthening your spine. You’re keeping it neutral.
How to Do It
- Get on all fours with your wrist, elbow, and shoulder in line.
- On your legs, keep your knee and hip in line.
- Keep a neutral spine. Your butt sticks out just a little bit, your chin is down, and your neck is arched a little.
- Master that, then bring up one arm at a time. Try not to lose your posture. Try not to round or tense, and try not to extend. Maintain a neutral posture.
- When you can master that on both sides, pick up the opposite leg. If your left hand is up, your right leg comes up too.
- When you can do that on both sides, extend everything out, so your leg is long and your arm is long, without losing postural control.
Recommended Sets and Reps: Do one to three minutes, one to three sets, per side, at each level until you have mastery.
Form Tip: Ideally, you don’t see any change in your spine, even as your arms and legs move.
What Is Posturology?
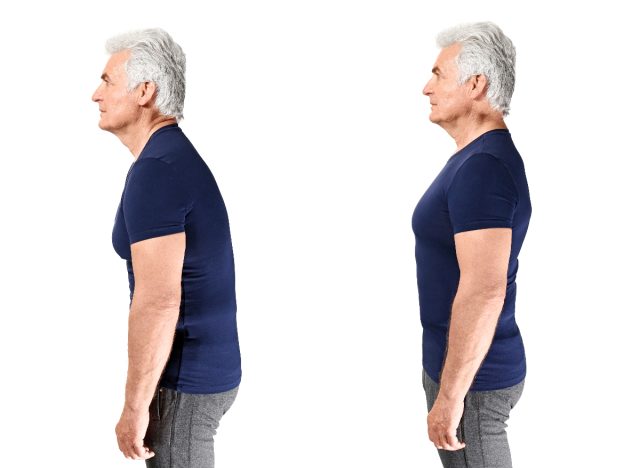
The muscles that pull your shoulder blades together are a major player in your overall posture. Granted, they can control the position of your shoulder, but they’re not the ones that actually hold you upright, so that’s really not the best way to go.
There’s an entire field of study called posturology that looks at how the body organizes and controls posture. One of the concepts we use in posturology is called proprioception. If you’ve followed me before, you’ve heard a lot about it, but it is a really important piece of many things in the body, especially posture.
Proprioception is basically your body’s ability to recognize where it is in space without having to look. For example, if you close your eyes and you lift your arm, you know where your arm is. You know if you’re moving your fingers. You don’t have to look at it because you sense it. The same system helps your brain recognize the position of your spine, pelvis, and really the rest of your body.
RELATED: 4 Morning Exercises That Flatten a Hanging Stomach Faster Than Sit-Ups After 60
Find Your Gravity Line
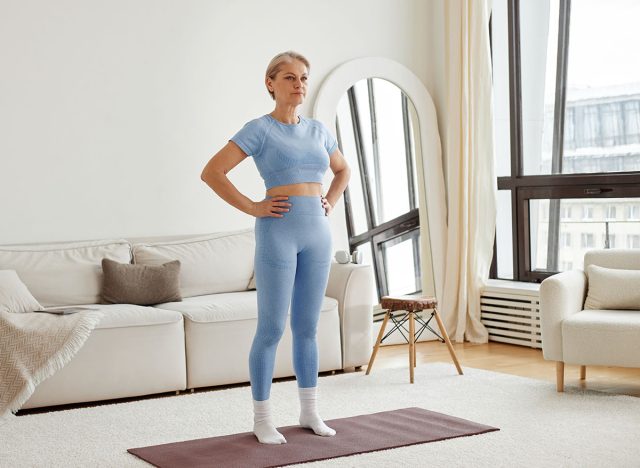
Proprioception helps establish your gravity line. When we look at someone from the side, we’re looking at how the ear (or the tragus, the middle of the ear), the shoulder, the hip, and eventually the ankle if you’re standing, all line up in gravity.
Everybody’s built a little differently, so we’re not trying to force everybody into one standard posture or one exact position. But the gravity line gives us a reference for how the body is organized and how the muscles are working to support it.
We call it the gravity line because the goal is to keep your body in alignment with gravity. To the degree that your head sits forward, your shoulders round, or even your butt sticks out, you’re getting pulled out of your gravity line. Therefore, you’re dealing with higher forces of gravity. Basically, you’re giving gravity something to pull down on, and that can lead to postural dysfunction and potential compression of the vertebrae and the tissues around them.
Why Balance Training Works

Even when you’re standing still, you’re not actually completely still. Your body is constantly making little adjustments to maintain your balance. Your brain takes information from your muscles, joints, eyes, and inner ear and uses it to make adjustments to your posture. Some of those adjustments happen automatically through what we call postural reflexes.
When we work on improving posture, we don’t necessarily just want to stretch the tight muscles and strengthen the weak ones. Those things can be helpful, but we also want to work on how the nervous system controls the body. We can do that through balance and proprioceptive training.
When we challenge your balance, your nervous system has to make adjustments to keep you stable. The muscles around your spine and pelvis have to coordinate with one another to maintain your position, and with practice, we can improve how well the body performs those tasks.
This becomes especially important as we get older because balance, strength, and postural control can all change with age. We may not be able to completely reverse every change in the body, but we can certainly work on improving the way our body moves and supports itself. The idea is to improve your body’s ability to recognize and maintain its position rather than having to constantly remind yourself to stand up straight.
The post 5 Exercises That Restore the Posture You Had at 40 After 65 appeared first on Eat This Not That.


