
Getting winded on the stairs is one of the complaints I hear most often from clients past 60. After nearly four decades as a personal trainer, and 25 years as co-founder of TRAINFITNESS, the UK’s best provider of in-person and online personal training courses, I’ve heard it more often than almost any other.
That breathlessness isn’t a fact of aging. It’s a sign the body has lost condition, and lost condition responds to training at any age. With a few standing exercises done regularly, stairs start to feel easier within a few weeks.
Why Stairs Leave You Breathless

Most people blame their heart first, but it’s usually the legs and the heart and lungs together. After 60, the thigh and calf muscles lose strength year on year, especially when daily activity has dropped off. When the legs are weak, every step is close to a maximum effort, so the heart rate jumps and the breathing follows it. Weak legs make you feel unfit even when your heart is perfectly fine.
The heart and lungs add their own share. When they’re out of condition, they can’t get oxygen to the working muscles quickly enough, so breathlessness arrives early and lingers afterwards. On the stairs you meet both problems at once: legs demanding more than they can produce, and a delivery system that hasn’t been asked to keep up in years.
That’s why I always start with the legs. Building leg strength and endurance usually makes the biggest early difference, because each step stops being a near-maximal effort and the heart rate stops spiking in response.
One caution first. If your breathlessness is new, sudden, or comes with chest pain, dizziness or swollen ankles, see your GP before starting any exercise. It can be a heart or lung issue rather than a fitness problem, and that needs looking into before you train through it.
RELATED: 4 Wall Exercises That Flatten Belly Sag Faster Than Sit-Ups After 65
Why Standing Exercises Work
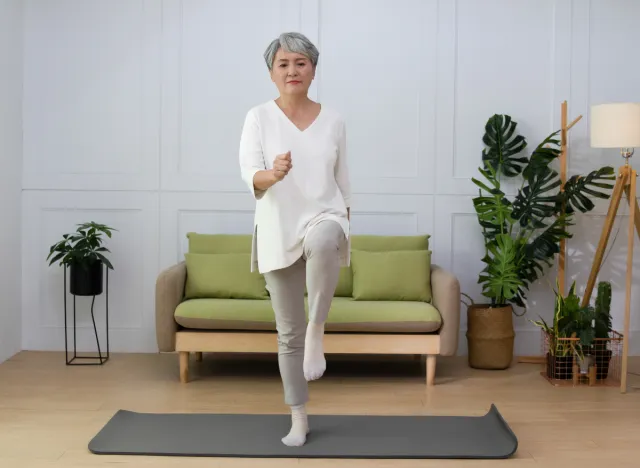
Standing exercises work well here because they train the body in the position it uses on the stairs. You’re upright, bearing your own weight, keeping your balance as you move. There’s no getting down onto the floor and back up again, which puts many people off exercising before they’ve even begun. When a workout is easy to start, it actually gets done.
They also mirror what a staircase demands: pushing up through one leg, rising onto the ball of the foot, staying steady while breathing. The body adapts fastest to training that resembles the job you want it to do, so the strength and stamina you build standing carry straight across to a real flight.
Twenty-one days is enough to notice a difference because the early gains come quickly. The muscles and the nervous system become more efficient within the first few weeks, so each step costs less effort before you’ve built much visible strength. The heart and lungs adapt quickly as well, once they’re asked to work most days. That’s why three weeks of near-daily work genuinely makes stairs feel easier.
I’d treat 21 days as a start rather than a finish. Stairs will feel easier inside three weeks, and full fitness keeps building well beyond that point if you carry on. The improvements don’t stop at day 21. If anything, they’ve barely got going.
These five are the ones I give clients, in the order I’d introduce them. Together they build the leg strength, the staying power and the breathing rhythm that a flight of stairs demands. All of them are done standing at home, with nothing more than a stair, a wall and a chair.
Step-Ups
This is the closest thing to the stairs themselves. It trains the exact muscles, plus the heart and lungs, in the very pattern you’re struggling with, which means every repetition transfers directly. It builds strength and stamina at the same time, which is why it leads the list.
How to Do It:
- Stand facing the bottom stair or a low, sturdy step, holding the rail.
- Step up with one foot and press through that leg to bring yourself up.
- Bring the other foot up to meet it, so both feet are on the step.
- Step back down under control, one foot at a time.
- Lead with the other leg on the next repetition.
Avoid These Mistakes:
- Don’t haul yourself up on the rail or push off the back foot. Do the work through the stepping leg.
- Use a lower step if you can’t rise without pulling, and stay there until you can.
Sets and Reps: 2 to 3 sets of 10 to 15 repetitions, with 30 to 60 seconds of rest between sets.
Form Tip: The rail is there for balance only, so keep the grip light.
RELATED: 5 Home Exercises That Reverse Muscle Loss Better Than Lifting Weights After 65
Wall Sit
A flight of stairs is a long effort, and it’s the thighs that fade halfway up. Holding a wall sit builds the staying power in those muscles so they don’t burn out mid-climb. You’re teaching the thighs to keep working under load, which is the exact job a staircase gives them.
How to Do It:
- Stand with your back flat against a wall, feet a step or two out in front.
- Slide down until the knees are bent partway, only as far as is comfortable.
- Keep the back flat against the wall and hold the position.
- Hold for 15 to 30 seconds.
- Rest, then repeat.
Avoid These Mistakes:
- Don’t slide down too far too soon, or the knees will complain. Go only as low as is comfortable.
Sets and Reps: 3 holds of 15 to 30 seconds, with a rest between each hold.
Form Tip: Depth isn’t the prize; time under load is. Build the depth and the hold gradually across the three weeks.
Calf Raises
Every stair is a push up onto the ball of the foot, so the calves do more of the lifting than most people realise. Strong, tireless calves take a big part of the load off the thighs and steady you at the same time. They’re also quick to respond to training, so you’ll feel the benefit early.
How to Do It:
- Stand tall behind a chair, hands resting on it for balance.
- Rise up onto the balls of the feet, lifting the heels as high as is comfortable.
- Pause briefly at the top.
- Lower the heels slowly back down.
Avoid These Mistakes:
- Don’t bounce up and down quickly. Rise and lower slowly.
- Don’t lean on the chair so heavily that it does the work. Use it for balance only.
Sets and Reps: 2 sets of 15 to 20 repetitions.
Form Tip: The slow lowering is where much of the strength is built, so don’t rush it.
RELATED: 6 Bodyweight Exercises That Sculpt Abs Faster Than Weights After 50
Marching Intervals
This trains the heart and lungs directly. Short bursts of brisk marching lift the breathing and the heart rate, then let them recover, and that up-and-down pattern is how the cardiovascular system gets fitter. A flight of stairs is exactly that kind of effort, a short burst with a rest at the top, so this is the closest conditioning match you’ll find standing still.
How to Do It:
- Stand tall and march on the spot, lifting the knees and pumping the arms.
- Work briskly enough to get a little out of breath.
- Keep it up for 30 seconds.
- Slow right down for 30 seconds and let the breathing recover.
Avoid These Mistakes:
- Don’t go flat out on the first burst and have to stop altogether.
- Don’t stroll so gently that the breathing never lifts.
- Make the slow spells genuinely recover you before the next round.
Sets and Reps: 5 rounds of 30 seconds brisk and 30 seconds slow.
Form Tip: Aim for slightly out of breath but still able to talk.
Paced-Breathing Step Drill

A lot of the winded feeling comes from breathing out of rhythm with the effort. People hold their breath, push, then arrive at the top gasping. Pairing the breath with the movement makes each step more efficient and takes the panic out of feeling breathless. You’re also training yourself to keep breathing steadily as the effort rises, which carries over to every real flight.
How to Do It:
- Stand by the bottom stair or your step.
- Breathe in as you prepare to move.
- Breathe out slowly as you step up, so the effort happens on the out-breath.
- Breathe in as you step down.
- Keep the rhythm going, breathing out on every climb.
Avoid These Mistakes:
- Don’t hold your breath on the effort. That’s exactly what leaves you gasping at the top.
- Breathe out as you step up, every time.
Sets and Reps: 10 to 12 steps, woven in whenever you use a real flight of stairs.
Form Tip: Saying it out loud helps at first: in on the floor, out on the step.
RELATED: 4 Walking Exercises That Strengthen Knees Better Than Gym Equipment After 60
How Often to Do This
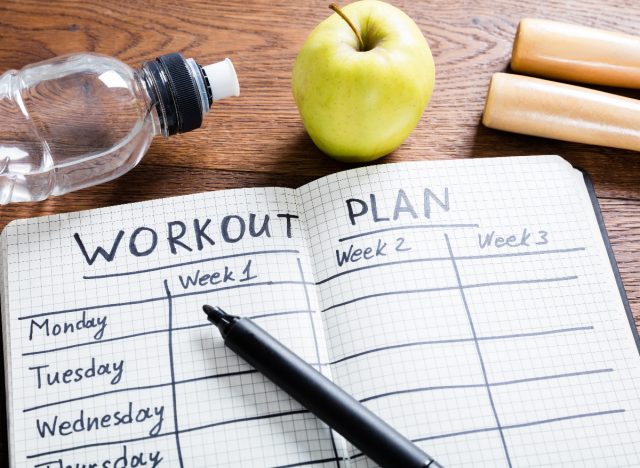
Keep it simple: most days, roughly 15 minutes, done in one go or split through the day, whichever fits your routine. Aim for 4 to 6 days a week across the three weeks, and take an easier day whenever you feel tired or sore rather than forcing the full session.
Warm up first by marching gently on the spot for a couple of minutes. A full session then looks like this:
- Step-ups: 2 to 3 sets of 10 to 15, with 30 to 60 seconds of rest between sets
- Wall sit: 3 holds of 15 to 30 seconds, with a rest between each hold
- Calf raises: 2 sets of 15 to 20
- Marching intervals: 5 rounds of 30 seconds brisk and 30 seconds slow
- Paced-breathing step drill: woven in whenever you use a real flight of stairs
Build the numbers up gradually over the three weeks. In week 1, stay at the bottom of the ranges and focus on doing each movement well. In week 2, add a few repetitions, an extra set, or five seconds on the wall sit.
In week 3, work towards the top of the ranges on the days you feel good, and drop back to week 1 numbers on the days you don’t. If a session leaves you drained the next morning, you’ve overdone it: ease back and build up again.
What to Expect by Day 21

By day 21, most people find a familiar flight leaves them less breathless than it did three weeks earlier, and their breathing settles at the top much faster. Each step simply costs less, because stronger legs with more stamina mean the heart rate never climbs as high in the first place. The stairs still ask for effort, but they stop asking for everything you’ve got.
The signs show up before day 21:
- You’ll need fewer pauses on the way up.
- You’ll reach the top able to talk in full sentences.
- Your thighs will burn less and shake less.
- Your breathing will settle within a minute or two instead of hanging about.
Any one of those tells you the work is landing.
People who start out quite unfit often notice changes in the second week. Others feel little until the end of week three. Both patterns are normal, so measure yourself against your own day 1 rather than anyone else’s. The simplest test: pick one flight at the start, count the pauses you need, then count again on day 21.
Don’t stop when you get there. Full fitness keeps building well beyond three weeks, and the same sessions keep paying off for months if you keep them up. Twenty-one days gets the stairs feeling easier. The months after that are where they start to feel easy.
The post 5 Standing Exercises That Stop You Getting Winded on Stairs in 21 Days After 60 appeared first on Eat This Not That.


